gamedev

Unity Programming – Classes – Member Hiding – Intermediate – CSharp

Create an Empty Object abd attach this scripts:

– WarBand.cs


using UnityEngine;

using System.Collections;


public class WarBand : MonoBehaviour // banda da guerra
{
    
void Start()
    	{
   
	Humanoid human = new Humanoid(); // istanzio
        
        Humanoid enemy = new Enemy();
        
        Humanoid orc = new Orc();

        //Notice how each Humanoid variable contains
        //a reference to a different class in the
        //inheritance hierarchy, yet each of them
        //calls the Humanoid Yell() method.
        human.Yell(); // scrive Humanoid version of the Yell() method
        
        enemy.Yell(); // scrive Humanoid version of the Yell() method
        
        orc.Yell();   // scrive Humanoid version of the Yell() method  
    
	}

}

– Humanoid.cs


using UnityEngine;

using System.Collections;


public class Humanoid
{
    
	//Base version of the Yell method
    
	public void Yell() // urlo
    
	{
        
	Debug.Log("Humanoid version of the Yell() method");
    
	}

}

– Enemy.cs


using UnityEngine;
using System.Collections;

public class Enemy : Humanoid
{
    	//This hides the Humanoid version.
    	new public void Yell()
    	{
    	Debug.Log("Enemy version of the Yell() method");
    	}
}

– Orc.cs


using UnityEngine;

using System.Collections;


public class Orc : Enemy

{
    
	//This hides the Enemy version.
    
	new public void Yell()
    
	{
       
	Debug.Log("Orc version of the Yell() method");
    
	}

}

Console:
Humanoid version of the Yell() method

Humanoid version of the Yell() method

Humanoid version of the Yell() method

For italian people, come funziona?

Abbiamo una ereditarietà tra Humanoids -> Enemy -> Orcs e tre metodi con lo stesso nome
Dichiarando la funzione con la keyword – new – nascondiamo i metodi – new – in favore del metodo del padre – Humanoid.cs – che prende il sopravvento.

By |CSharp, Unity3D, Video Games Development|Commenti disabilitati su Unity Programming – Classes – Member Hiding – Intermediate – CSharp

Games Desktop Wallpapers – Black Desert Online

blackdesert_blog_large

Hi All!
Few days ago I decided to do some free high resolution desktop wallpapers.
Why I do that? To share my passion for games and graphic art with everybody.
I will work to create beautiful Games Desktop Wallpapers based on my preferred games.

Black Desert On Line

Here free Black Desert On Line Wallpapers.
I like this game, I have been playing Black Desert On Line since day one!
I’m a game developer and I can say without doubt that this game is a masterpiece.
Great asian style graphic design, great 3D art, great programming and great gameplay.
Download for free the wallpapers and try this game if you do not have it.

By |Unity3D, Video Games Development|Commenti disabilitati su Games Desktop Wallpapers – Black Desert Online

Unity – Load a JPG local resource or www and apply to Texture or to UI Image

Hi Nice people!
Today I’ll talk about load a JPG image from an external source and use it in your games or apps, so let’s start!
First we have to stop watching image with eyes… I mean… now we’ll watch our full of color world as Neo of Matrix, we’ll see a sequence of bytes dropping everywhere :)

If you convert an image to byte array you will get something like that:

0x89,0x50,0x4E,0x47,0x0D,0x0A,0x1A,0x0A,0x00,0x00,0x00,0x0D,0x49,0x48,0x44,0x52,
0x00,0x00,0x00,0x40,0x00,0x00,0x00,0x40,0x08,0x00,0x00,0x00,0x00,0x8F,0x02,0x2E,
0x02,0x00,0x00,0x01,0x57,0x49,0x44,0x41,0x54,0x78,0x01,0xA5,0x57,0xD1,0xAD,0xC4,
0x30,0x08,0x83,0x81,0x32,0x4A,0x66,0xC9,0x36,0x99,0x85,0x45,0xBC,0x4E,0x74,0xBD,
0x8F,0x9E,0x5B,0xD4,0xE8,0xF1,0x6A,0x7F,0xDD,0x29,0xB2,0x55,0x0C,0x24,0x60,0xEB,
0x0D,0x30,0xE7,0xF9,0xF3,0x85,0x40,0x74,0x3F,0xF0,0x52,0x00,0xC3,0x0F,0xBC,0x14,

… etc …

This is the way used by Unity to see the images O.O

Let’s go on with practice, theory is boring :p

Load local JPG and apply to GameObject-Material-MainTexture

1. Create a Scene with a Cube and attach the script below:

2. c# script


using UnityEngine;
using System.Collections;
using System.IO; // namespace to use File.ReadAllBytes

public class LoadLocalTexture : MonoBehaviour {

	string filePath;        // it is as "D:/Unity/Photo-Voodoo/FotoTest/img1.jpg"

	public byte[] fileData; // load data inside a byte array 0x89,0x50,0x4E,0x47,0x0D...

	public void Start() {

		 filePath = "D:/MyFolder/img1.jpg";                   // the path of the image
		 fileData = File.ReadAllBytes(filePath);              // 1.read the bytes array
		 Texture2D tex = new Texture2D(2, 2);                 // 2.create a texture named tex
		 tex.LoadImage(fileData);                             // 3.load inside tx the bytes and use the correct image size
		 GetComponent<Renderer>().material.mainTexture = tex; // 4.apply tex to material.mainTexture 
	}// END Start
	
	void Update () {
	
	}// END Update()
}// END Mono


Load local JPG and apply to UI Image

1. Create a Scene with a UI Image and attach the script below:

2. c# script


using UnityEngine;
using System.Collections;
using UnityEngine.UI; // namespace to use UI
using System.IO; // namespace to use File.ReadAllBytes

public class LoadLocalTextureToImageUI : MonoBehaviour {

	string filePath;        // it is as "D:/Unity/Photo-Voodoo/FotoTest/img1.jpg"
	public byte[] fileData; // load data inside a byte array 0x89,0x50,0x4E,0x47,0x0D...

	public Image imageToDisplay; // Assign in Inspector the UI Image

	// Use this for initialization
	void Start () {

		filePath = "D:/MyFolder/img1.jpg";                   // the path of the image
		fileData = File.ReadAllBytes(filePath);              // 1.read the bytes array
		Texture2D tex = new Texture2D(2, 2);                 // 2.create a texture named tex
		tex.LoadImage(fileData);                             // 3.load inside tx the bytes and use the correct image size 
		Rect rec = new Rect(0, 0, tex.width, tex.height);    // 4.create a rect using the textute dimensions
		Sprite spriteToUse = Sprite.Create(tex,rec,new Vector2(0.5f,0.5f),100); //5. convert the texture in sprite
		imageToDisplay.sprite = spriteToUse;                 //6.load the sprite used by UI Image
	}// END Start()
	
	// Update is called once per frame
	void Update () {
	
	}// END Update()
}// END Mono

3. Assign in Inspector the UI Image to imageToDisplay variable

Load www JPG and apply to UI Image

1. Create a Scene with a Cube and attach the script below:

2. c# script


using UnityEngine;
using System.Collections;
using UnityEngine.UI; // namespace to use UI

public class LoadwwwTextureToImageUI : MonoBehaviour {

	public Image imageToDisplay; // Assign in Inspector the UI Image
	public string addressWeb = "http://www.lucedigitale.com/img1.jpg";

	// Use this for initialization
	void Start () {

		StartCoroutine(isDownloading(addressWeb)); 

	}// END Start()
		

	IEnumerator isDownloading(string url){
		yield return new WaitForSeconds(1); // wait for one sec, without it you will have a compiiler error
		
		
		var www = new WWW(url); // 1.start a download of the given URL           
		yield return www;       // 2.wait until the download is done
                                        // 3.create a texture in DXT1 format
		Texture2D texture = new Texture2D(www.texture.width, www.texture.height, TextureFormat.DXT1, false);
		                        
		www.LoadImageIntoTexture(texture); //4.load data into a texture
		Rect rec = new Rect(0, 0, texture.width, texture.height); //5.create a rect using texture dimensions
		Sprite spriteToUse = Sprite.Create(texture,rec,new Vector2(0.5f,0.5f),100); // 6.convert the texture to sprite
		imageToDisplay.sprite = spriteToUse; //7.change the sprite of UI Image

		www.Dispose(); //8.drop the web connection NOTE: Unity drop automatically the connection at the end of the download, but we put it as a precaution

		www = null;

	}// END IEnumerator

	void Update () {
	
	}// END Update()

}// END Mono

3. Assign in Inspector the UI Image to imageToDisplay variable

I hope this article has been helpful, greetings :)

Reference: https://docs.unity3d.com/ScriptReference/Texture2D.LoadImage.html
Reference: http://answers.unity3d.com/questions/1122905/how-do-you-download-image-to-uiimage.html


By |CSharp, Unity3D, Video Games Development|Commenti disabilitati su Unity – Load a JPG local resource or www and apply to Texture or to UI Image

Unreal Engine – HDR Illumination

A basic lesson about using HDR Maps inside Unreal Engine 4

HDR Images Formats

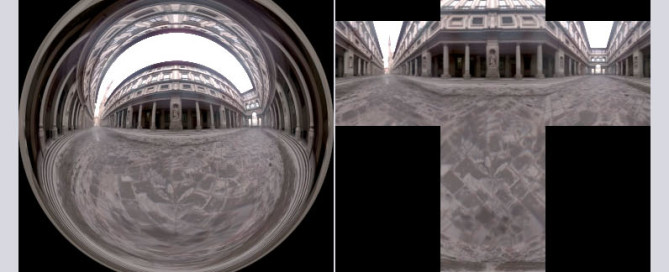
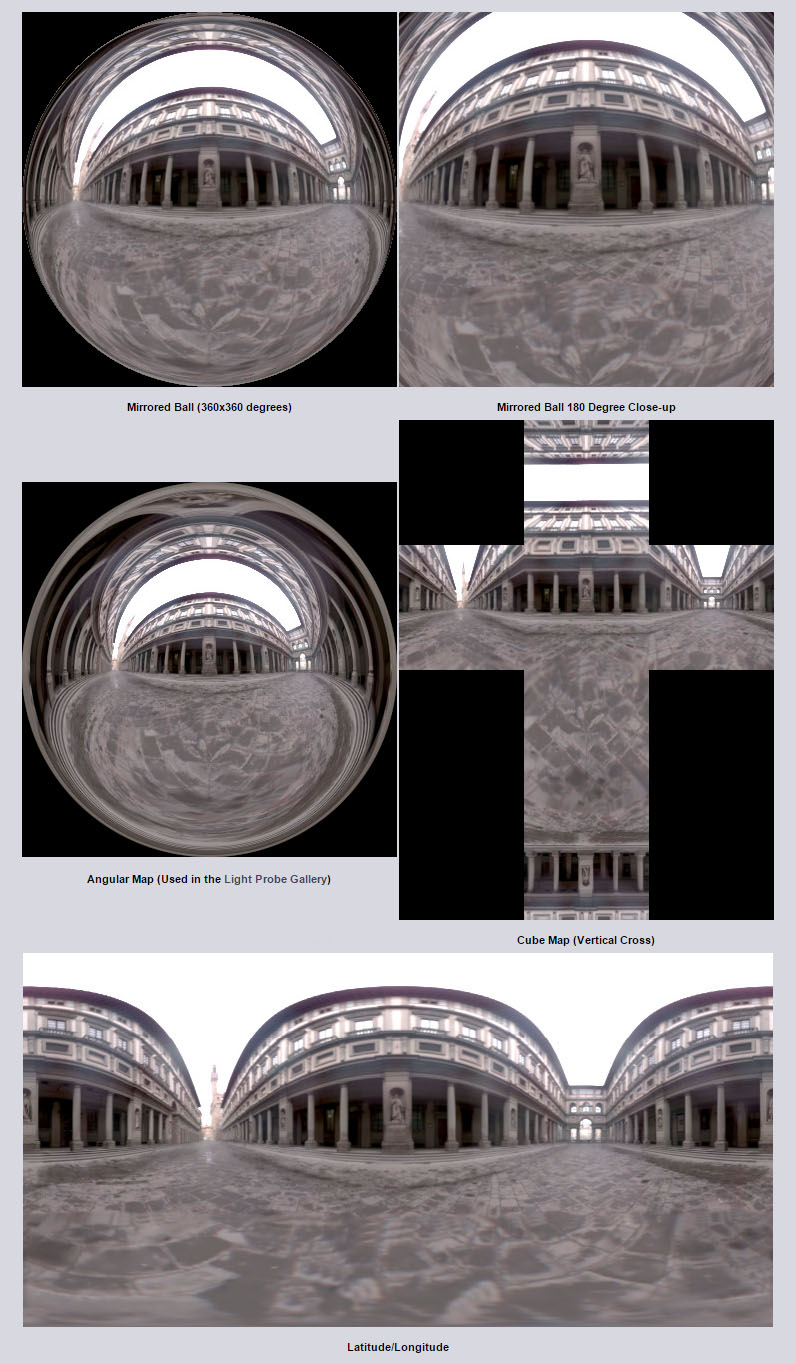
There are a lot of HDR image formats, see the images below:

hdr-formats

Edit HDR Images

OPTION 1.

a. Using HDR Shop (http://gl.ict.usc.edu/HDRShop/index.php) to create an HDR Cube Map in cross format

OPTION 2.

a. Using Picturenaut (http://www.hdrlabs.com/picturenaut/index.html) to create an HDR image
b. Using Cube Map Gen (http://developer.amd.com/tools-and-sdks/archive/legacy-cpu-gpu-tools/cubemapgen/) to create a Cube Map in cross format

Sky Lights

1. LEFT COLUMN> Lights> Sky Light

2. You can manually specify a HDR skybox cubemaps.
a. Select the Sky Light
b. RIGHT COLUMN> Light> Source Type> SLS Specified Cubemap
c. Content Browser> Import> a HDR Cube Map, DRAG AND DROP over Key Light> RIGHT COLUMN> Cubemap empty image slot

NOTICE:
1. The ambient light will be emitted by HDR Cube Map
2. Metals materials will reflect HDR Cube automatically

Ufficial docs at: https://docs.unrealengine.com/latest/INT/Engine/Rendering/LightingAndShadows/LightTypes/SkyLight/index.html

By |Unreal Engine, Video Games Development|Commenti disabilitati su Unreal Engine – HDR Illumination

Unreal Engine – Scene Management

How to manage a scene in Unreal Engine.

Assets Loading and Subdivision

All assets you will use inside your game are pre-loaded and saved by Unreal Engine insise its ‘Content’ folder.
You must divide the contents neatly in order to manage then in the best way.

The standard way is:

Content Browser> Content

– SFX
– BGMusic

– Blueprints

– Maps (here Levels)

– Materials
– Textures

– Particles

– Meshes

Game Levels

A game is divedes in multiple game levels. For example in a platform game there are multiple worlds, every world can be put inside a level.

1. MAIN TOP MENU> File> New Level> default or Empty
2. DRAG AND DROP in Maps folder (it’s not mandatory)
3. RMB over the Map: Edit/Rename/Duplicate etc…
4. MAIN TOP MENU> Window> Levels

Put elements inside a Game Level

1. Content Browser> DRAG AND DROP elements (Actors) into 3D Viewport

2. The elements are added inside RIGHT COLUMN> World Outlines.

Hot Keys of World Outlines are:

– SINGLE LMB empty area: select the actor
– SINGLE LMB over the name: rename the actor
– SHIFT + LMB: select multiple actors
– CTRL + LMB: add/remove selection
– DOUBLE LMB: focus on actor
– RMB: properties rollout> Select> All, Invert etc…

World outliner> Searching:

– Actors matching specific terms can be excluded by using “-” before a term.
– A term can be forced to match exactly, as opposed to a partial match, by adding a “+” before a term.
– Double quotes can be placed around the search term to force an exact match of the full term in the Actor’s long name.

Subdivide a Game Level

1. RIGHT COLUMN> World Outliner> ON THE TOP RIGHT ‘Create New Folder’
2. DRAG AND DROP elements inside the folder you have just created.

An example can be:

– Lights
– Heros
– Enemys
– Environment

NOTICE: the main parent is the Map

Statistics

MAIN TOP MENU> Window> Statistics

Father and son…

1. RIGHT COLUMN> World Outliner> DRAG AND DROP son over the parent

Layers

With layers you can manage visibility of Actors during the creative process.
For example, you might be working on a building that has multiple levels but is comprised of many modular parts. By assigning each floor to a layer, you can hide each of the floors you are not working on making the top view much more manageable.

1. MAIN TOP MENU> Window> Layers, Layer Tab will be added on the RIGHT COLUMN
2. RMB into Layer empty panel> Create Empty Layer
3. Select Actors in the 3D Viewport> RIGHT COLUMN> Layer Tab> RMB over the new Layer> Add Selected Actors to Selected Layers

OR

3. World Outliner> DRAG AND DROP Actor over Layers Tab> yourLayer

NOTICE: an Actor can be in as many layers as you want.

4. Select the Layer> BOTTOM LEFT ‘See Contents’ and TOP LEFT small icon ‘Back’

OR

4. DOUBLE LMB over the Layer name, INTO ‘World Outliner’ the Actors inside the Layer will be selected

By |Unreal Engine, Video Games Development|Commenti disabilitati su Unreal Engine – Scene Management