This is a practical guide about use websockets with node.js in locahost.
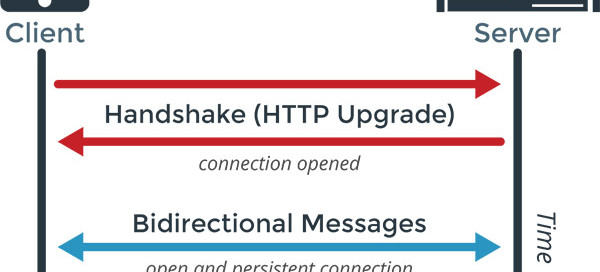
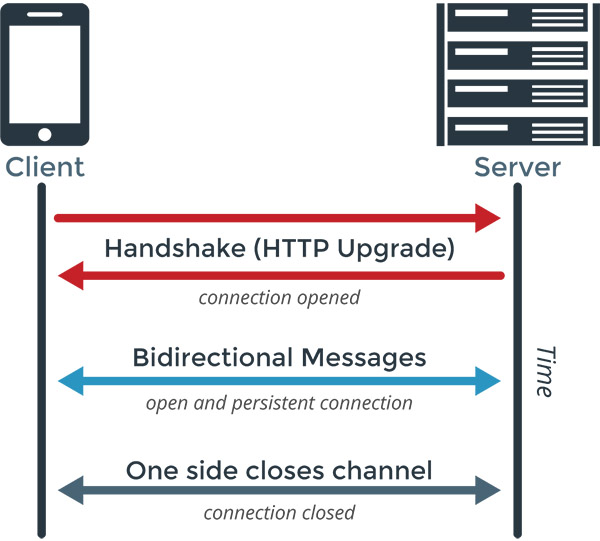
WebSocket is a computer communications protocol, providing full-duplex communication channels over a single TCP connection. (https://en.wikipedia.org/wiki/WebSocket)
A WebSocket is a persistent connection between a client and server and is perfect for chat, social applications, games, in general realtime communication applications.
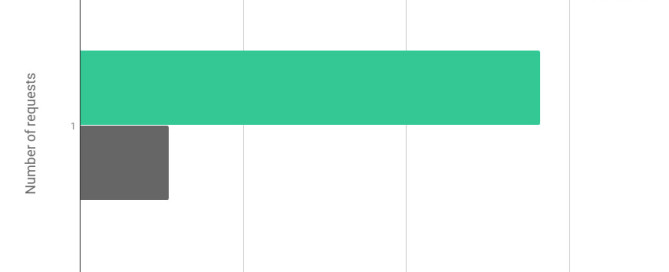
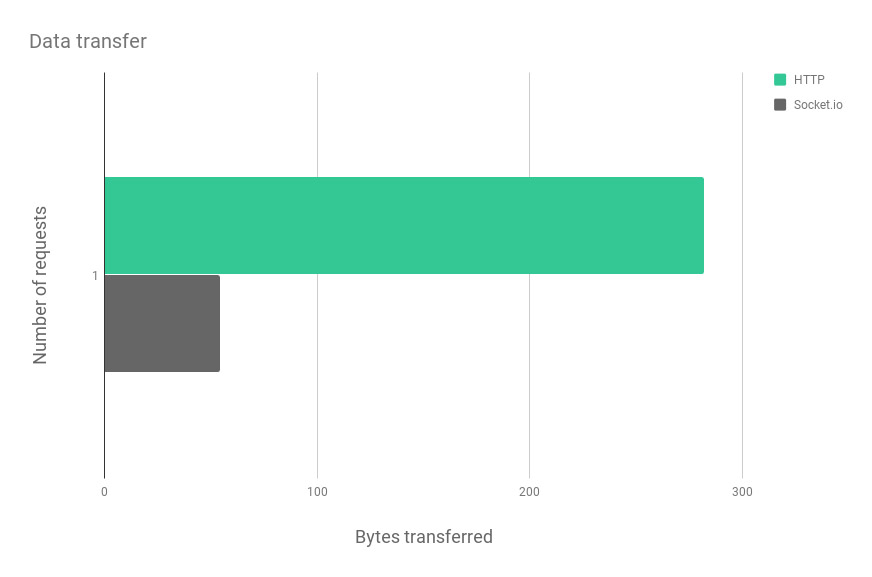
Data transfer is cery efficient, one HTTP request and response took a total of 282 bytes while the request and response websocket frames weighed in at a total of 54 bytes (31 bytes for the request message and 24 bytes for the response).
Ok, i’ll stop annoing you, let’s start coding 
Start your localhost environement, mine is Laragon
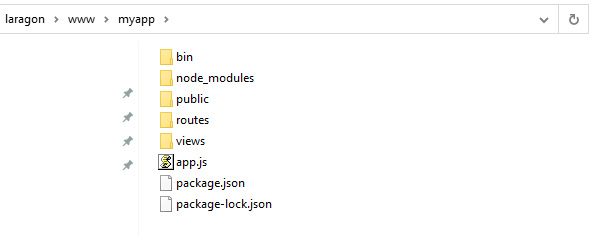
1. Create a new folder for this app laragon/www/websockets
2. Open the Laragon’s Cmder in laragon/www/websockets and type: node -v
If it is running you have node.js working in your system
3. Type: npm install socket.io
Install the module to manage Websocket
4. Create laragon/www/websockets/app.js
This is the main js file of you app
1 2 3 4 5 6 7 8 9 10 11 12 13 14 15 16 17 18 19 20 21 22 23 24 25 26 | var http = require('http');var fs = require('fs');// a. Load index.html var server = http.createServer(function(req, res) { fs.readFile('./index.html', 'utf-8', function(error, content) { res.writeHead(200, {"Content-Type": "text/html"}); res.end(content); });});// b. Load Socket.io, socket.io listen to server = http.createServer...var io = require('socket.io').listen(server);// c. When a client connect write a message in consoleio.sockets.on('connection', function (socket) { console.log('New user connected'); socket.emit('message', 'You are connected!');// In case of an event "message" from client socket.on('message', function (message) { console.log('The client say:' + message); });});server.listen(8080); |
The actions in order are:
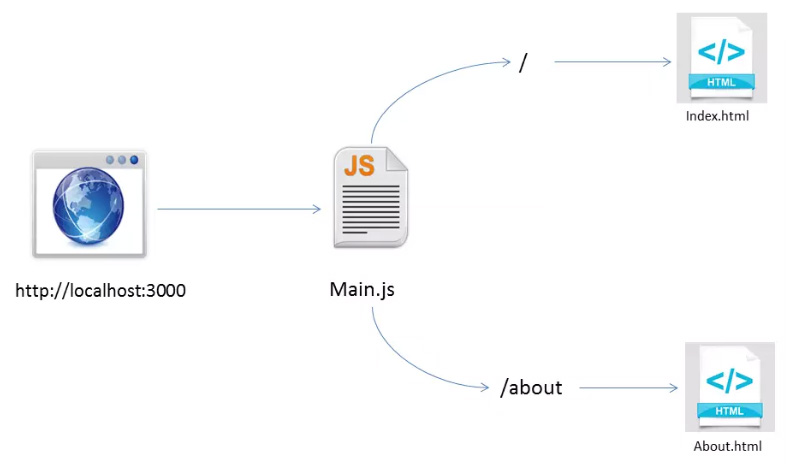
a. create a classic http connection to load index.html
b. open, using Websocket a tunnel between client and server, this will be now a stable full duplex connection
c. check in console the success of the handshake and send a message to client
5. Create laragon/www/websockets/index.html
This is the client side rendered by the browser
1 2 3 4 5 6 7 8 9 10 11 12 13 14 15 16 17 18 19 20 21 22 23 24 25 26 | <!DOCTYPE html><html><head> <meta charset="utf-8" /> <title>Socket.io</title></head><body> <h1>Using Socket.io!</h1> <p> <input type="button" value="Poke" id="poke" /> </p> <script src="/socket.io/socket.io.js"></script> <script> socket.on('message', function(message) { alert('The server says: ' + message); }); $('#poke').click(function () { socket.emit('message', 'Server listen to me!'); }) </script></body></html> |
The connection with the WebSocket is:
1 2 3 4 | <script src="/socket.io/socket.io.js"></script> <script> </script> |
It is important put this JS near to not interfere with the loadind of the page
6. Time to test the code, type in terminal: node app.js
Start the server
7. Connect the browser at localhost:8080
Look the terminal, it will say: New user connected
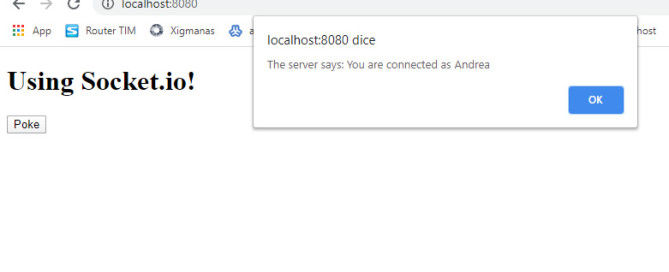
Look at the browser, it will open an alert with the server message -> this in the message from server
Push the button Poke, the terminal will receive Server listen to me! -> this in the message from client
Notice about socket.emit()
1 2 3 4 5 6 | // emit one parameter only// parameter can be everything: player_score, player_chat, player_scoressocket.emit('message', 'You are connected!');// emit supports multiple parameter toosocket.emit('message', { content: 'You are connected!', importance: '1' }); |
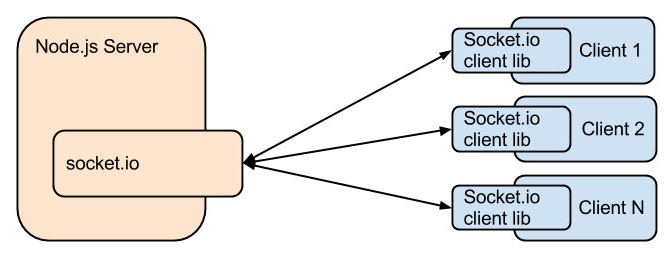
BROADCAST
Broadcasting is the distribution of some content to a dispersed audience using WebSockets.
Take the previous code and change it as show below
laragon/www/websockets/app.js
1 2 3 4 5 6 7 8 9 10 11 12 13 14 15 16 17 18 19 20 21 22 23 24 25 26 27 | var http = require('http');var fs = require('fs'); // a. Load index.html var server = http.createServer(function(req, res) { fs.readFile('./index.html', 'utf-8', function(error, content) { res.writeHead(200, {"Content-Type": "text/html"}); res.end(content); });}); // b. Load Socket.io, socket.io listen to server = http.createServer...var io = require('socket.io').listen(server); // c. When a client connect write a message in consoleio.sockets.on('connection', function (socket) { console.log('New user connected'); socket.emit('message', 'You are connected!'); socket.broadcast.emit('messagebroadcast', 'New user connected'); // In case of an event "message" from client socket.on('message', function (message) { console.log('The client say:' + message); });}); server.listen(8080); |
laragon/www/websockets/index.html
1 2 3 4 5 6 7 8 9 10 11 12 13 14 15 16 17 18 19 20 21 22 23 24 25 26 27 28 29 | <!DOCTYPE html><html><head> <meta charset="utf-8" /> <title>Socket.io</title></head><body> <h1>Using Socket.io!</h1> <p> <input type="button" value="Poke" id="poke" /> </p> <script src="/socket.io/socket.io.js"></script> <script> socket.on('message', function(message) { alert('The server says: ' + message); }); socket.on('messagebroadcast', function(messagebroadcast) { alert('Broadcast message: ' + messagebroadcast); }); $('#poke').click(function () { socket.emit('message', 'Server listen to me!'); }) </script></body></html> |
Notice the code:
1 2 3 4 5 6 7 | // serversocket.broadcast.emit('messagebroadcast', 'New user connected');// clientsocket.on('messagebroadcast', function(messagebroadcast) { alert('Broadcast message: ' + messagebroadcast); }); |
Now at every new connection, all clients will be informed via an alert window
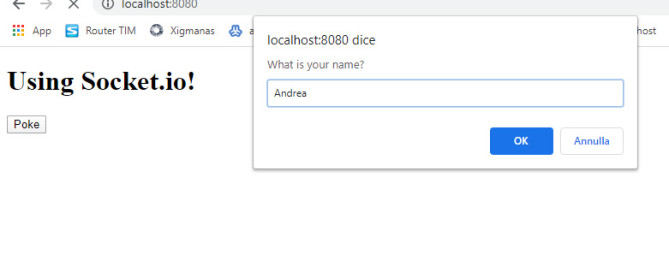
CLIENT IDENTIFICATION
We need to identify a client to create a real life app.
Change the code as shown below:
laragon/www/websockets/app.js
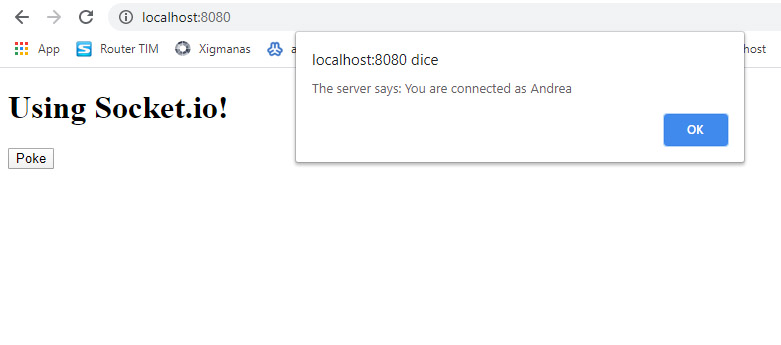
1 2 3 4 5 6 7 8 9 10 11 12 13 14 15 16 17 18 19 20 21 22 23 24 25 26 27 28 29 30 | var http = require('http');var fs = require('fs'); // a. Load index.html var server = http.createServer(function(req, res) { fs.readFile('./index.html', 'utf-8', function(error, content) { res.writeHead(200, {"Content-Type": "text/html"}); res.end(content); });}); // b. Load Socket.io, socket.io listen to server = http.createServer...var io = require('socket.io').listen(server); // c. When a client connect write a message in consoleio.sockets.on('connection', function (socket) { // anonym user console.log('Anonym user connected'); // know user socket.on('newbie', function(username) { socket.username = username; // store the userID here console.log('Username: ' + socket.username + ' connected!'); socket.emit('message', 'You are connected as' + socket.username); }); }); server.listen(8080); |
laragon/www/websockets/index.html
1 2 3 4 5 6 7 8 9 10 11 12 13 14 15 16 17 18 19 20 21 22 23 24 25 26 27 | <!DOCTYPE html><html><head> <meta charset="utf-8" /> <title>Socket.io</title></head><body> <h1>Using Socket.io!</h1> <p> <input type="button" value="Poke" id="poke" /> </p> <script src="/socket.io/socket.io.js"></script> <script> var username = prompt('What is your name?'); socket.emit('newbie', username); socket.on('message', function(message) { alert('The server says: ' + message); }); </script></body></html> |
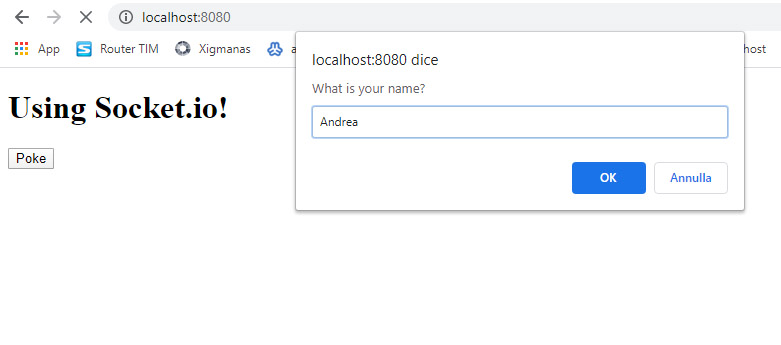
Notice that socket.io create a new session variable for every new connection, check the snippets below:
1 2 3 4 5 6 7 8 9 10 11 12 13 14 | // serversocket.on('newbie', function(username) { socket.username = username; // store the userID here as session variable console.log('Username: ' + socket.username + ' connected!'); socket.emit('message', 'You are connected as ' + socket.username); });// clientvar username = prompt('What is your name?'); socket.emit('newbie', username); // YOU CAN SEND THE USER ID HERE socket.myvariable = myvariable; socket.on('message', function(message) { alert('The server says: ' + message); }); |
Now it is easy to create a simple chat software, the flow will be:
1. CLIENT
a.send e message to the server
1 | socket.emit('your-event', { name: 'john', message: 'lorem' }) |
2. SERVER
a. get the name of the user and the message
1 2 3 4 | socket.on('your-event', ({ name, message }) => { // name: // message:}) |
b. broadcast the message with the name attached
1 | socket.broadcast.emit('your-event', { name: 'john', message: 'lorem' }) |
3. CLIENT
a. receive the message broadcasted
1 2 3 4 | socket.on('your-event', ({ name, message }) => { // name: // message:}) |
b. render in the window the message
$(“your-tag”).append() [using JQuery]
Here the official tutorial about making a chat with socket.io: https://socket.io/get-started/chat/
Have fun!
For further informations:
– official web site of socket.io https://socket.io/
– other WebSockets for node.js https://blog.bitsrc.io/8-node-js-web-socket-libraries-for-2018-818e7e5b67cf
– using express https://www.programwitherik.com/getting-started-with-socket-io-node-js-and-express/
– using react https://itnext.io/building-a-node-js-websocket-chat-app-with-socket-io-and-react-473a0686d1e1
– ready to use commercial chat applications https://codecanyon.net/tags/socket.io