Allegorithmic – Substance Designer – Basic Tutorial
With Substance Designer you can create great materials for your favourite 3D application.
A ‘Substance’ is a file with the .SBSAR extension that can be used into 3DS Max, Maya, Unity3D, Unreal Engine.
Let’s go on!
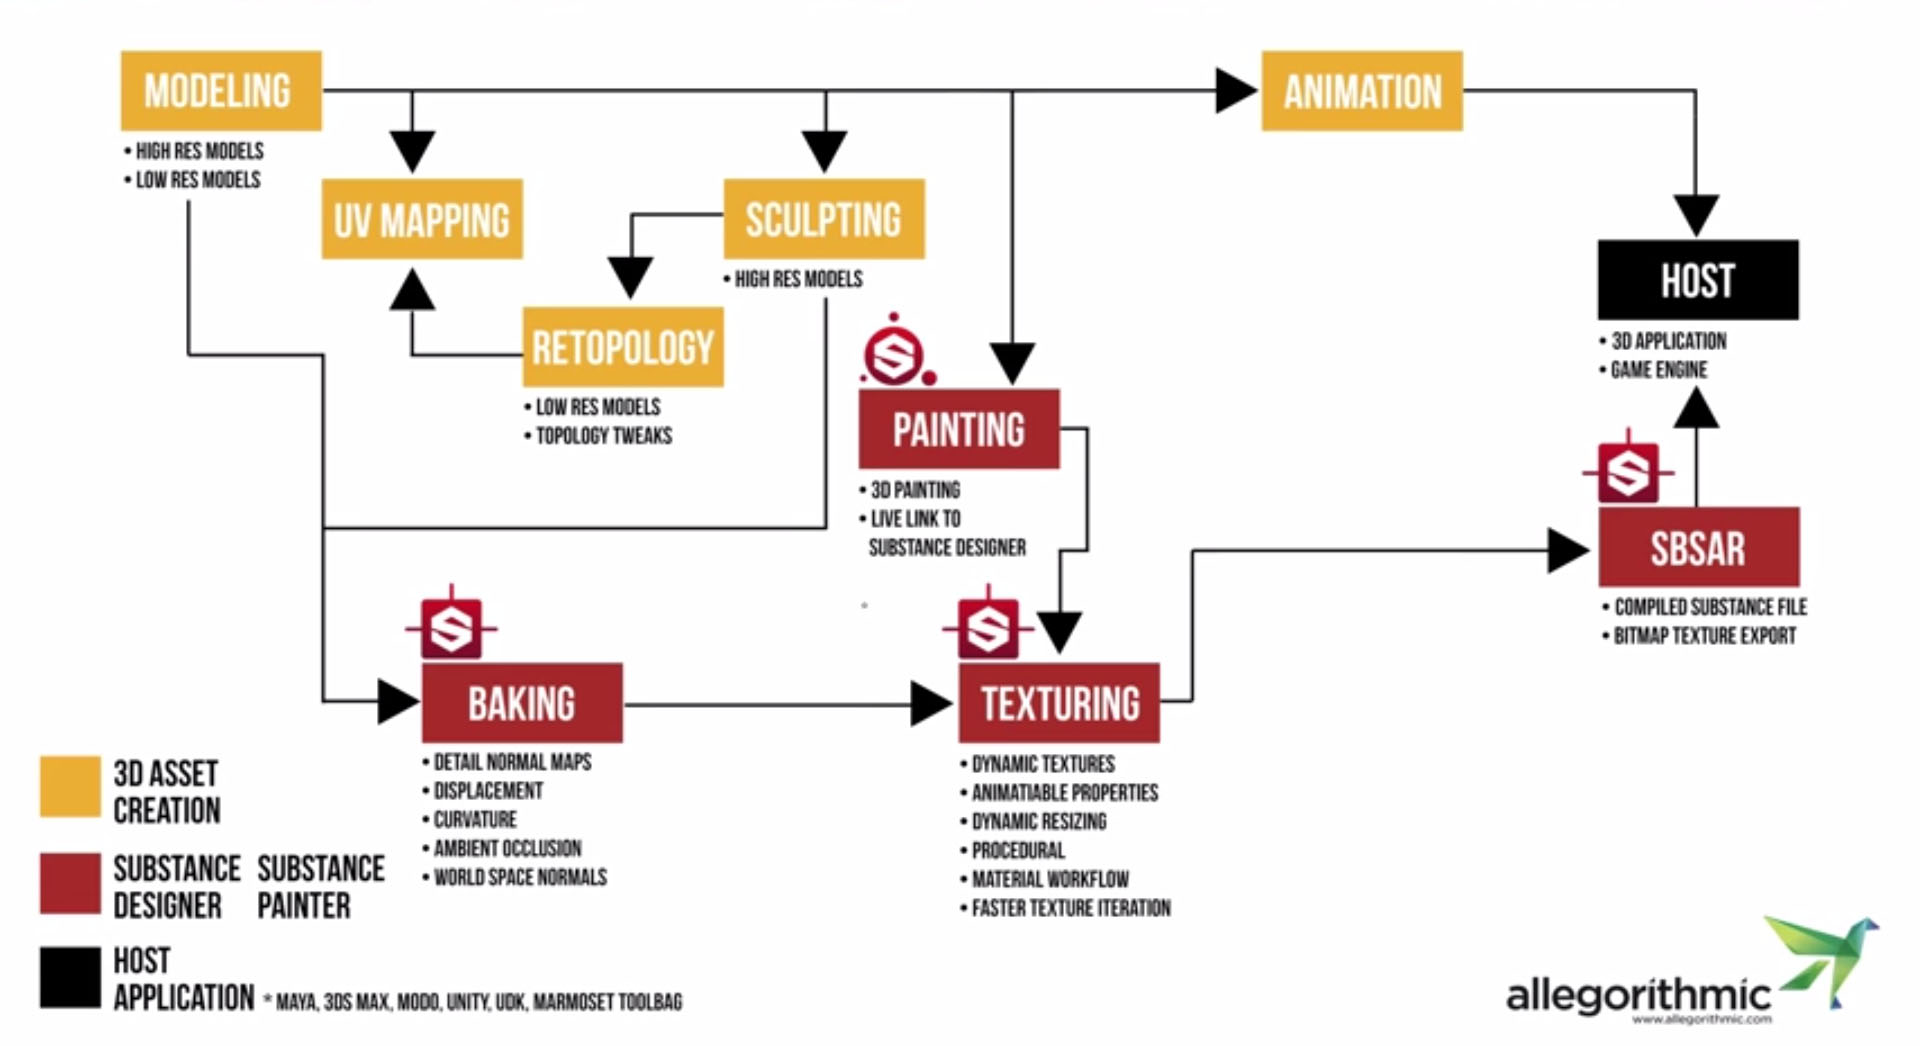
Where can you use Substance Designer in your pipeline?
You need create a model and the UV Map using for example 3DSMax or MudBox, then import the mesh inside Substance Designer and here create the maps, see the workflow below:
Initial setup
1. Open Substance Designer
2. 3D View> Materials> Default> Shader> physically_based
– LMB to rotate View
– SHIFT+LMB to move light
3. Tools> Switch Engine…> Direct3D or SSE2
Create new substance
1. MAIN TOP MENU> File> New Substance…
2. ‘New Substance’ Window> ‘Outputs’ label> BOTTOM RIGHT ‘Add Output’ to add a channel, expard the roolout of the channel to select the type of maps that can be:
– diffuse
– baseColor
– opacity
– emissive
– ambient
– ambientOcclusion
– mask
– normal
– bump
– height
– dispacement
– specular
– specularLevel
– specularColor
– glossiness
– roughness
– anisotropyLevel
– anisotropyAngle
– transmissive
– reflection
– refraction
– environment
– IOR
– scattering
– any
– metallic
– panorama
Not bad!
3. DRAG AND DROP a bitmap file over New_Graph Window> Import resource(s)
4. DRAG AND DROP from BOTTOM LEFT Library> Material Filters> 1-Click> ‘Bitmap to Material Light’ over New_Graph Window
5. Connect the Input/output values as you can see in the graph below
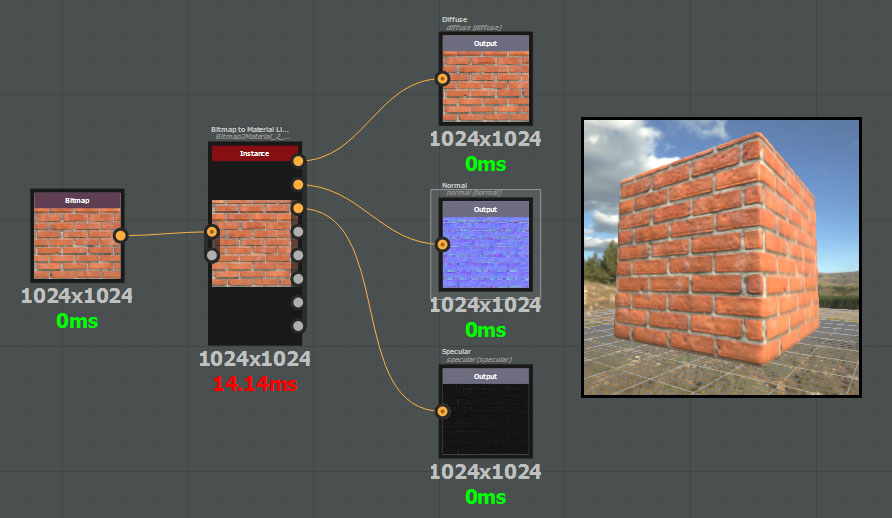
6. Click over Bitmap to Material Light Box, setup parameters on the right box
Add simple dirt
See the diagram below
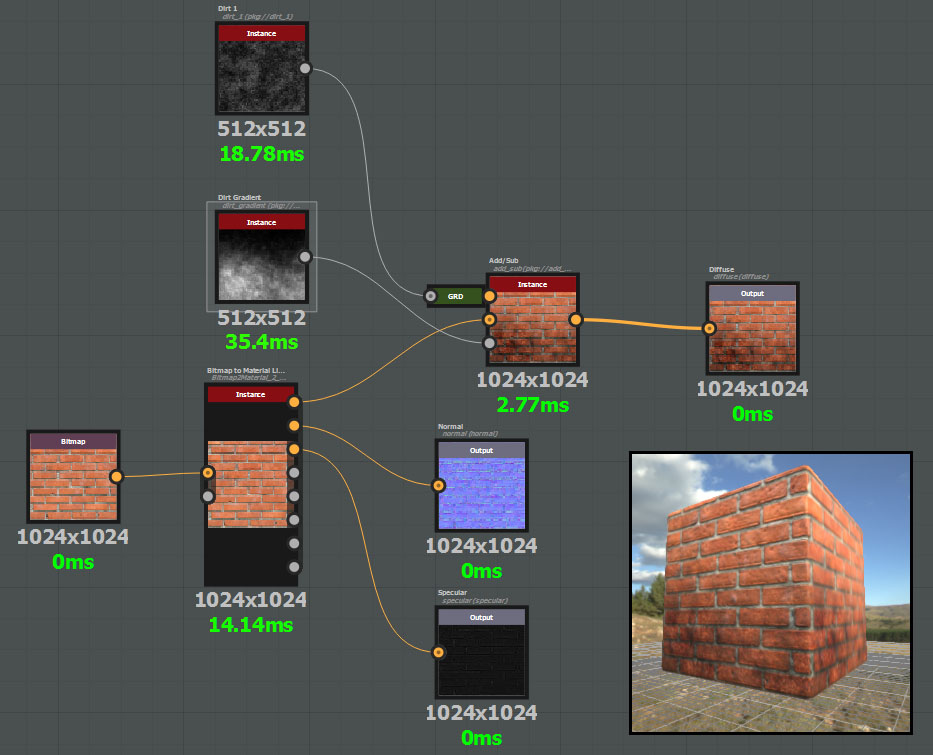
Notice the blocks:
Library>Generators> Dirt ———————————> | Filters Add/Sub Foreground |
Library>Material Filters>Bitmap to Materia Light -> | Filters Add/Sub Background | -> Diffuse Output
Library>Noises> Dirt Gradient —————————> | Filters Add/Sub Mask |
Make tileable
See the diagram below
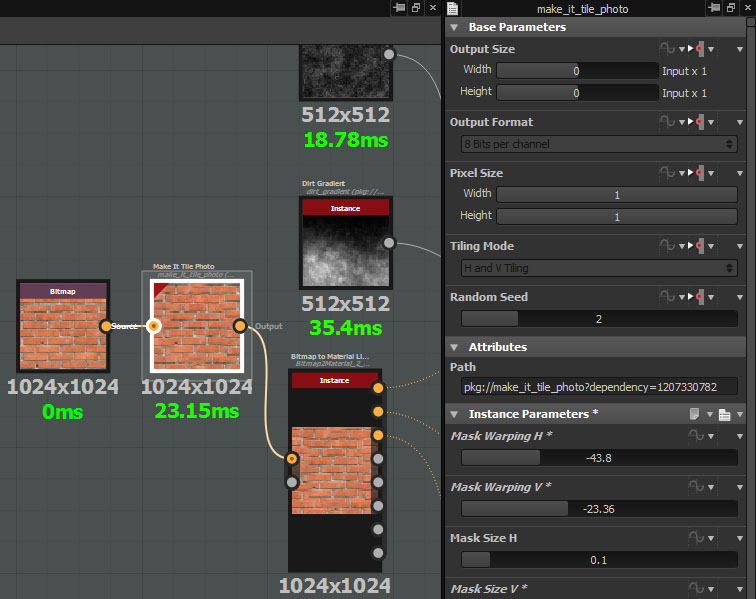
Notice the blocks:
Bitmap -> | Library> Filters> Tiling> Make It Tile Photo | -> etc…
Save the project
1. TOP LEFT> Explorer> RMB over ‘New_Graph’> Rename> Bricks
2. TOP LEFT> Explorer> RMB over ‘Unsaved Package’> Save As…> Bricks.sbs
This is our project file. In order to edit a substance, you must then have its .sbs file.
In your hard drive you will find Bricks.sbs + Bricks.resources Folder with bitmap files.
Export the substance
1. TOP LEFT> Explorer> RMB over Bricks.sbs> Publish…> Bricks.sbsar
SBSAR files are heavily optimized for performance and contain only the data required to render the Substances they contain, thus SBSAR nodes cannot be opened for editing. This file is created to be imported in your 3D Software (3DSMax, Unity3D etc…).
In your hard drive you will find ONLY Bricks.sbsar, all resouces and code are embedded in this file.
Import the substance in Unity3D
1. Open Unity3D> Project> RMB> Import New Asset> Bricks.sbsar Done!!!
2. Setup in Inspector if you want.
Import a mesh of 3DS MAX
1. Inside 3DS Max create:
– a mesh
– assign UV
– assign a material from using Material Editor
Export in fbx format.
1. Open Substance Designer> File> New Substance
2. DRAG AND DROP the .fbx file over Substance Designer> Unsaved Package
It will be created a Folder Resources> Your Mesh> RMB> Open
3. 3D View> Geometry> Display UVs in 2D View
3D View> Materials> Your Mesh Material
4. DRAG AND DROP the bitmap texture of the Mesh over New_Graph Window and create your substance
5. RMB over New_Graph> View outputs in 3D View


